> For the complete documentation index, see [llms.txt](https://guides.tability.io/docs/llms.txt). Markdown versions of documentation pages are available by appending `.md` to page URLs; this page is available as [Markdown](https://guides.tability.io/docs/become-a-tability-power-user/integrations/hubspot.md).
# Hubspot
## Overview
You can connect Tability to Hubspot to automatically pull metrics from Hubspot without having to switch context.
Once you add Hubspot as a data source for an outcome/Key Result, Tability can:
* Automatically pull the most recent value of the metric when you open the check-in form.
* Perform a daily sync of the metric while the plan is active (Premium subscription only).
{% hint style="warning" %}
Available on **Plus** and **Premium** subscriptions
{% endhint %}
## Requirements
* You need to be a Tability admin or owner to connect Tability to Hubspot
* You will also need to be a Hubspot admin to complete the setup.
### How to connect Tability to Hubspot
1. Go to **Workspace Settings > Integrations**
2. Click on the button **Connect to Hubspot**
3. Follow the steps to connect your Hubspot workspace to Tability
### Using the Hubspot integration
Once Hubspot is connected, you will be able to use it as a data source for your outcomes/KRs.
**Step 1. Open up your edit panel of your outcome/KR**

Click on "Edit" to open up the Edit panel of any outcome/KR in your workspace.
**Step 2. Select Hubspot as a data source**

Go to the "Data source" tab and select Hubspot.
**Step 3. Pick the metric that you would like to connect**
Use the dropdown to select the metric that you want to connect to your outcome/KR.
**Step 4. Save your connection**
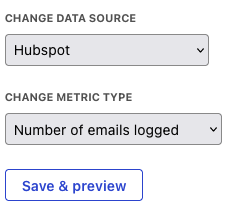
Click on "Save & preview" to complete the connection.
Tability will retrieve the current value for that metric and your screen should look like this 👇

**Step 5. Enable daily sync**
{% hint style="warning" %}
Available only on **Premium** subscriptions
{% endhint %}
You can now toggle the option to Enable daily sync of your metric if you're on a Premium subscription.
Tability will retrieve the value of your metric from Hubspot once a day, and will create a check-in on behalf of the owner of the outcome/KR.
The first data sync should happen within 1h of enabling this option.
### How to use the data source in your check-ins

It's all automatic! Once an outcome/KR is connected to a data source, Tability will automatically pull the current value whenever you open up the check-in modal.