> For the complete documentation index, see [llms.txt](https://guides.tability.io/docs/llms.txt). Markdown versions of documentation pages are available by appending `.md` to page URLs; this page is available as [Markdown](https://guides.tability.io/docs/become-a-tability-power-user/features/security-and-admin/scim-provisioning-okta.md).
# SCIM Provisioning - Okta
Here's how you can set up user provisioning with SCIM with Okta.
## Single Sign On (SSO) vs. provisioning
If you're using an external directory to manage your users then there are 2 distinct capabilities to enable:
* Setting up SSO to allow your users to log in using the credentials that you configured in your directory
* Setting up provisioning (this guide) to be able to control the list of users and roles that have access to Tability from your directory.
## Before: setup up the Tability app in Okta
Complete the steps in the [SAML SSO - Okta](/docs/become-a-tability-power-user/features/security-and-admin/saml-sso-okta.md) guide to add a new Tability application in your Okta admin.
## Part 1: Getting your SCIM base URL and auth token from Tability
1. Sign in to Tability with an admin account
2. Open up the admin section and go to **SSO & Provisioning**
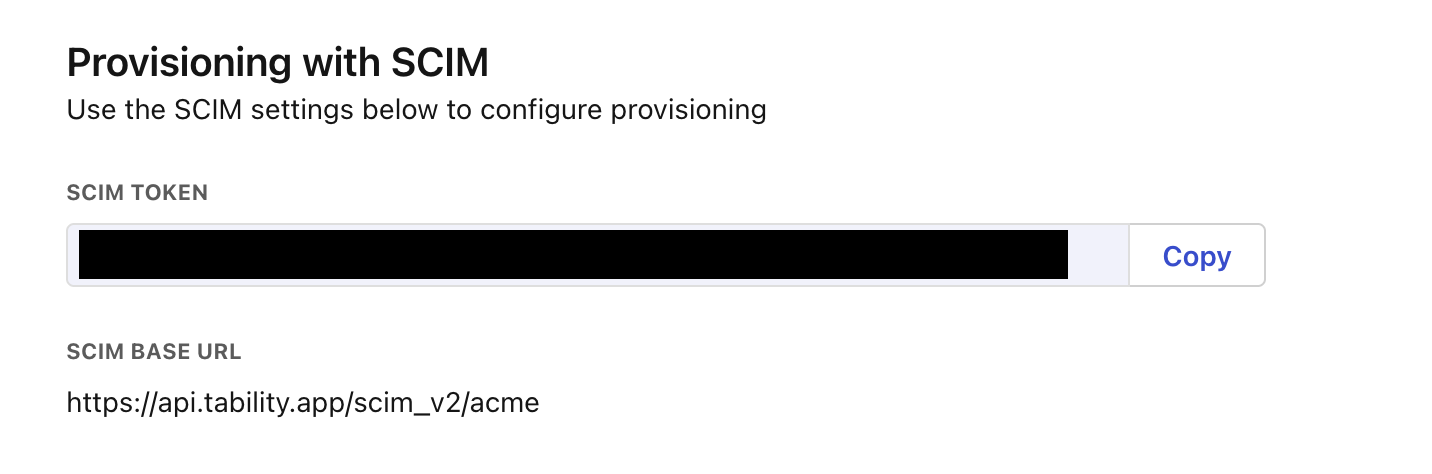
At the bottom of the page you will find the **SCIM authentication token** and the **SCIM base URL** that you will need later to configure Okta.
## Part 2: Setting up provisioning in Okta
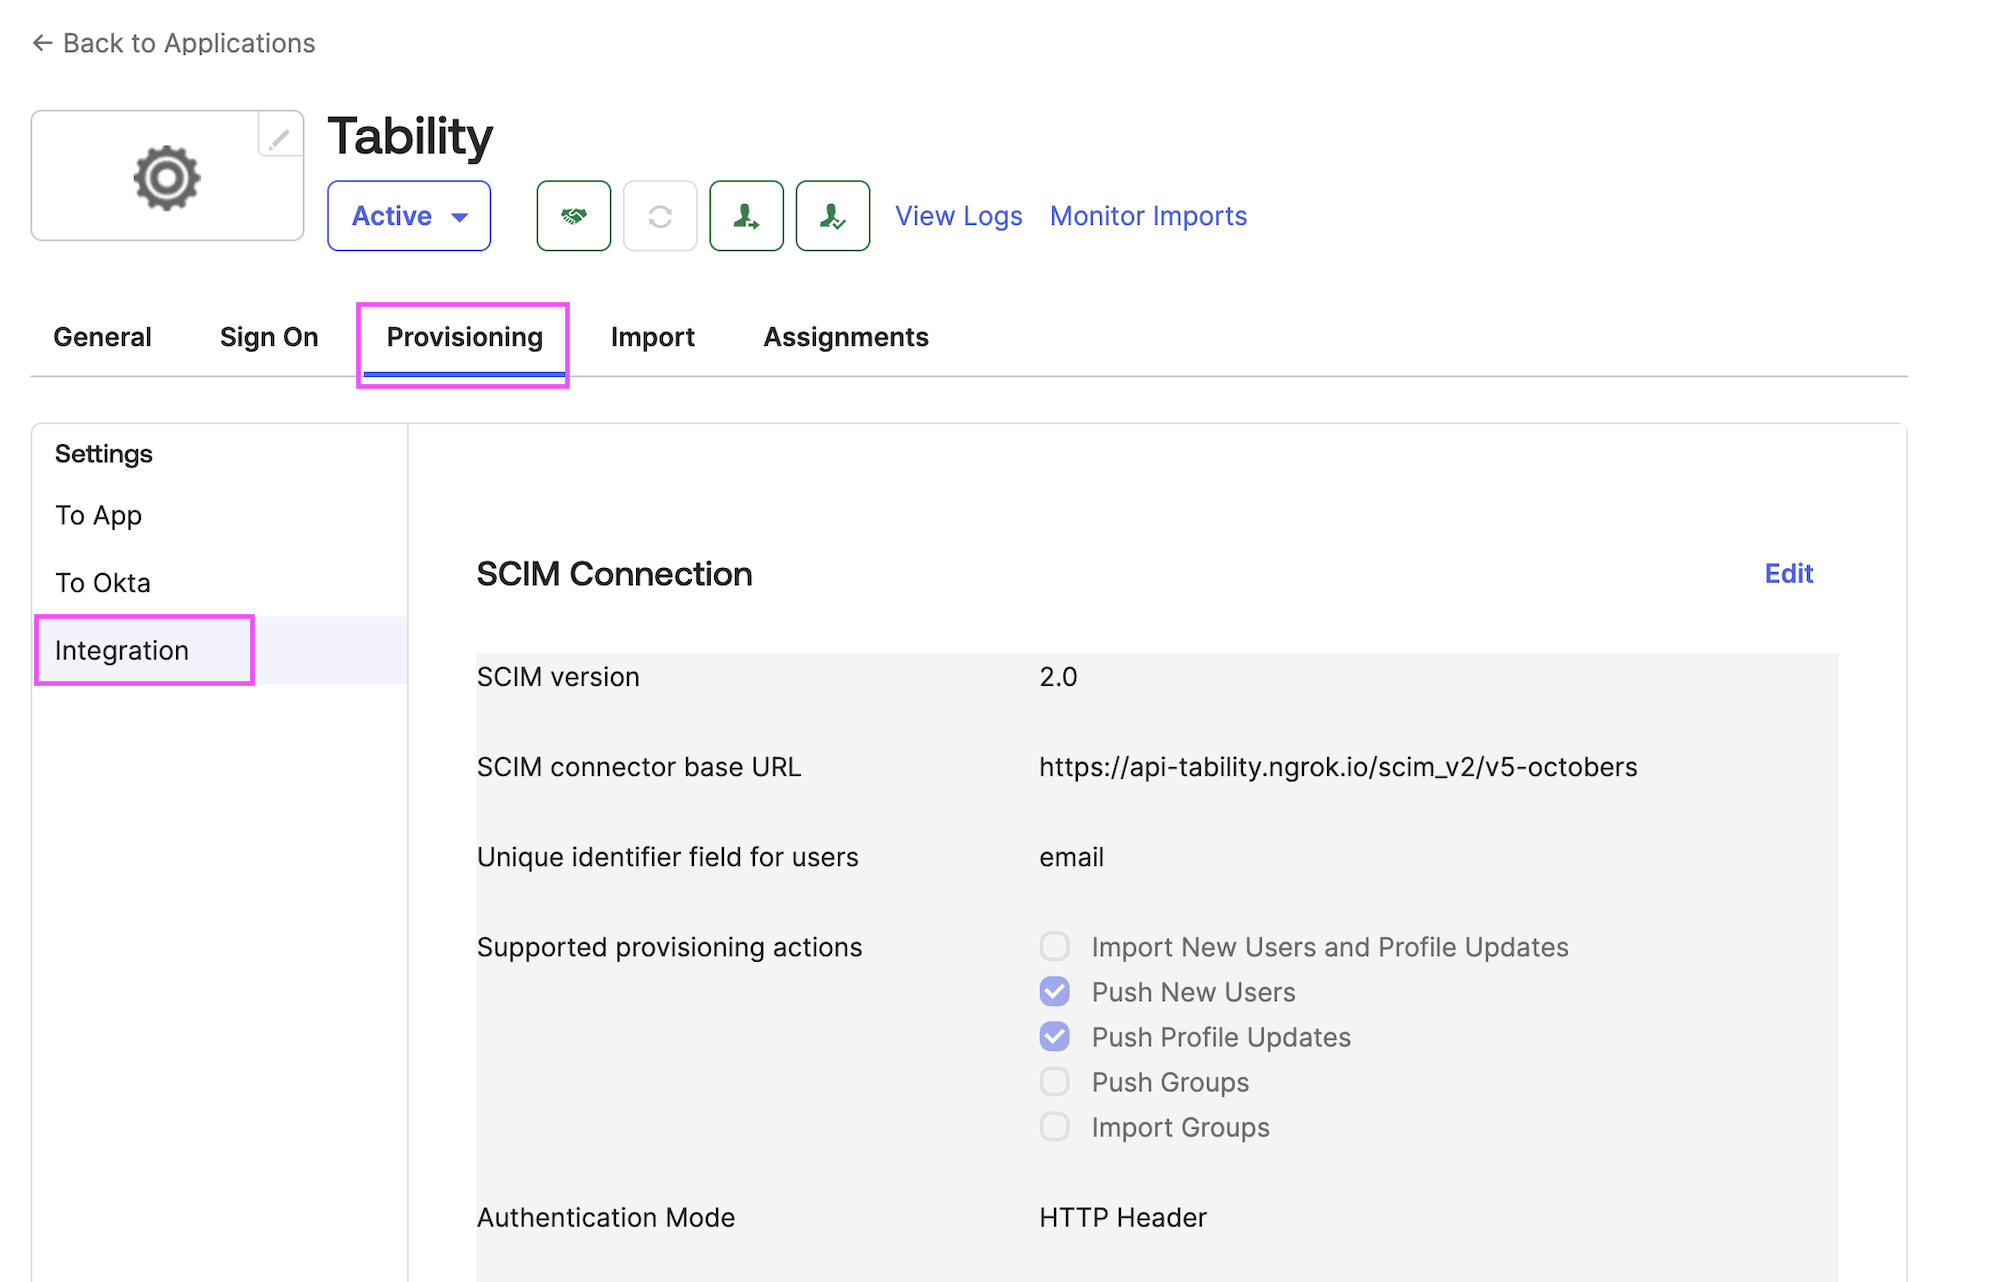
1. Go to your Tability application in the Okta admin
2. Go to **Provisioning > Integration**
3. Click on **Edit**
4. Use the following settings to complete your connection
1. **SCIM connector base URL:** copy the SCIM base URL from Tability
2. **Unique identifier field for users:** email
3. **Supported provisioning actions:** select **Push New Users** and **Push Profile Updates**
4. **Authentication Mode:** HTTP Header
5. **Authorization:** add the SCIM authentication token from Tability
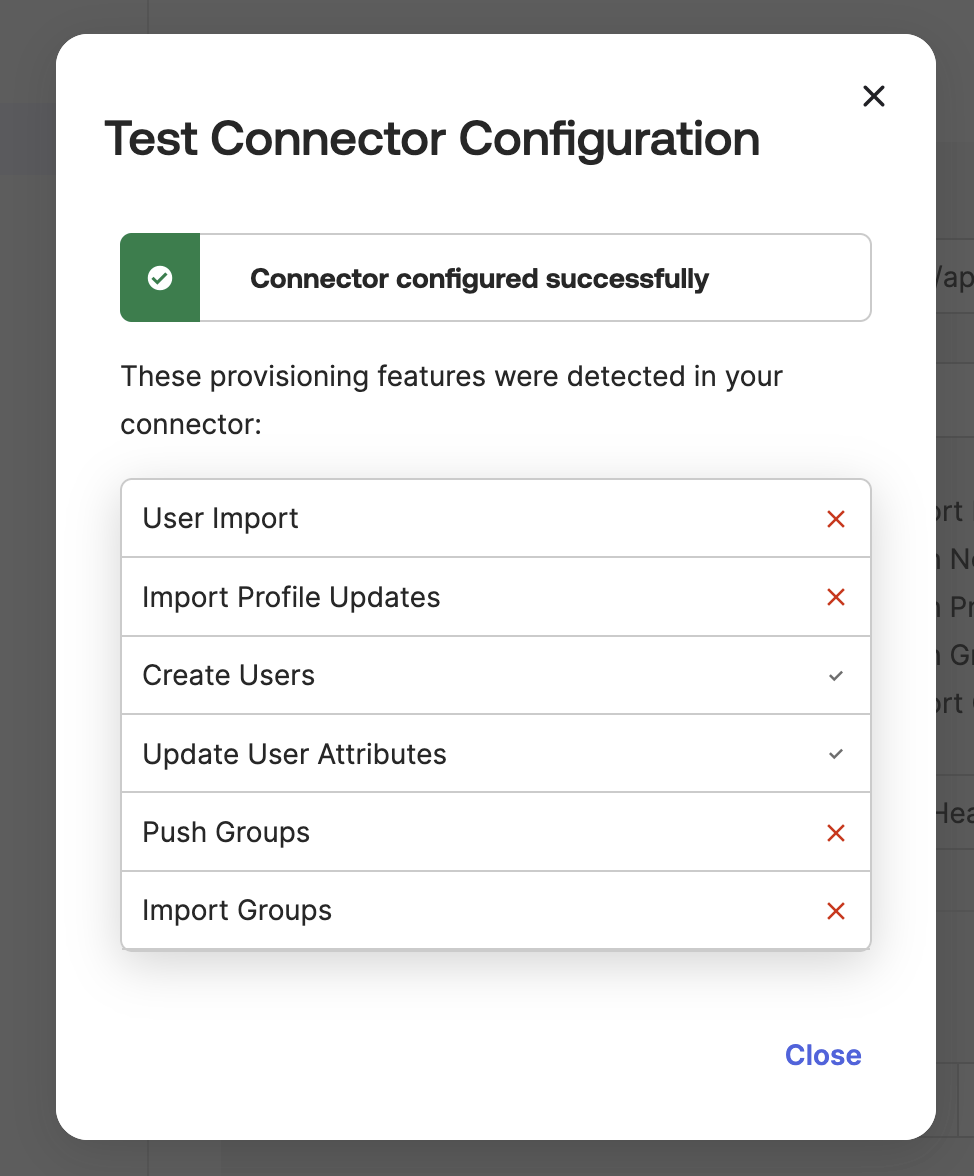
5. Click **Test Connector Configuration**. You should see a popup confirming that **Create Users** and **Update User Attributes** are enabled for this integration.
6. Click **Save** to complete the setup
## Part 3: Enable provisioning to app
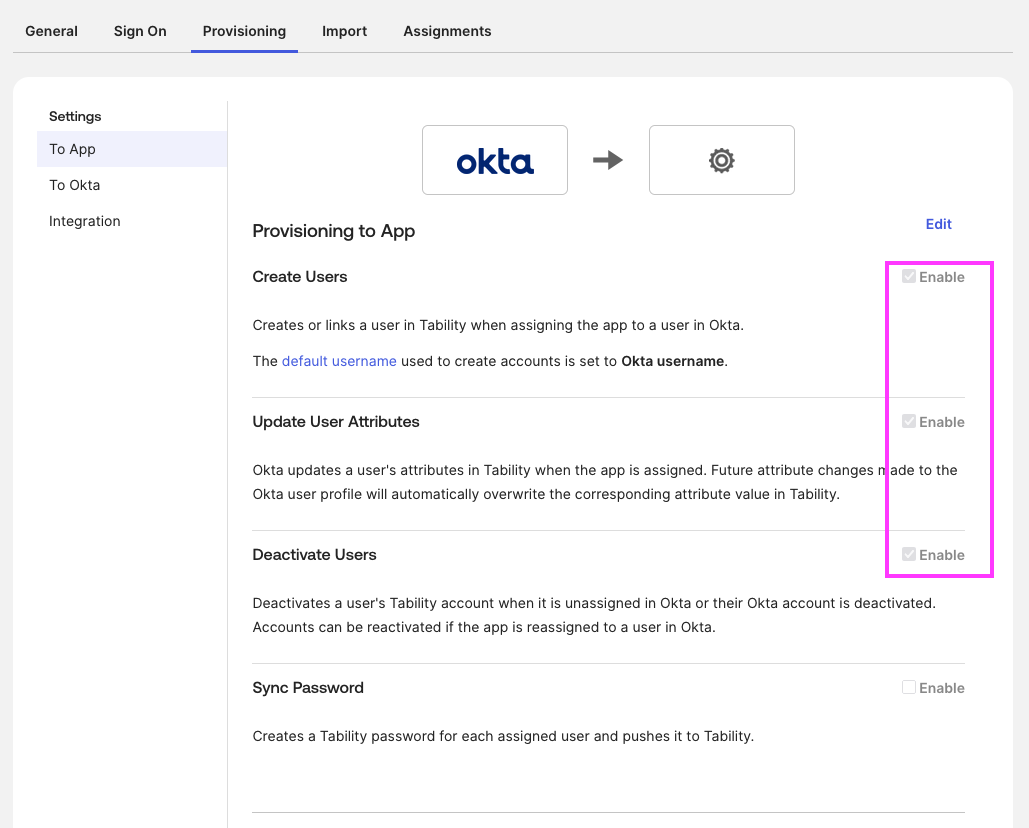
Once the connection is setup, you need to make sure that the following features are enabled in the **Provisioning > To App** screen:
* Create Users
* Update User Attributes
* Deactivate Users
This is what your screen should look like.
## Part 4: Assigning people to Tability
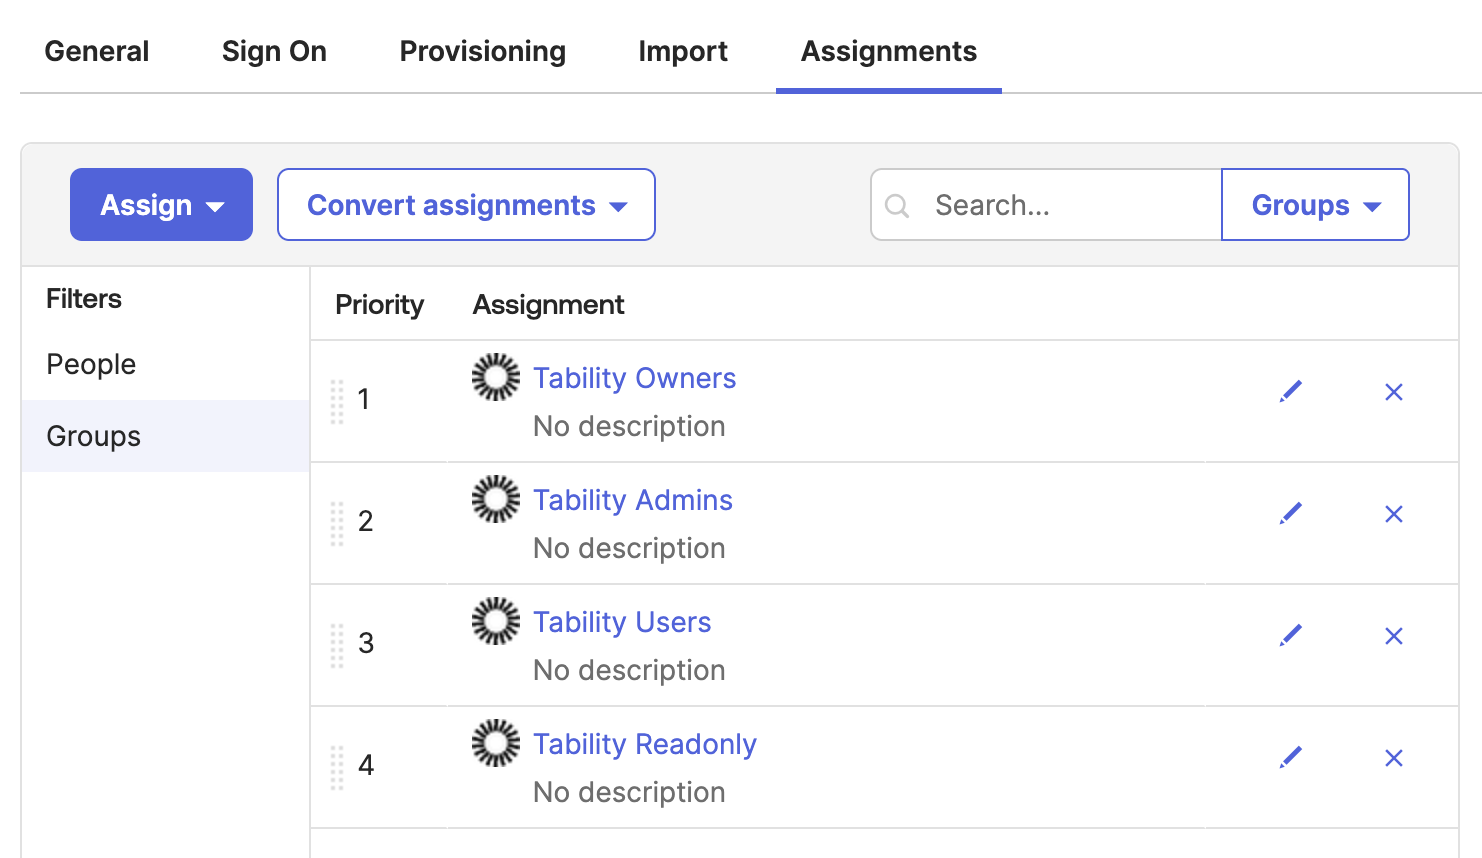
We recommend using groups to manage the assignment of users in Tability. Here are the 4 groups we suggest creating:
* **Tability Owners:** list of people that should have the owner role in the workspace (they can control all the settings, including the subscription).
* **Tability Admins:** list of users with the admin role
* **Tability IT Admins:** list of users with the admin role
* **Tability Users:** anyone who should be a regular user of Tability
* **Tability Readonly:** list of users that should have read-only access to Tability
Once your groups are created, you can assign them to the Tability application in Okta.
1. Go to the **Assignments > Groups** configuration screen for the Tability app in Okta

2. Click **Assign > Assign to Groups**
3. Select the group to assign, and use the **User type** field to map the group role to the right role in Tability (see table below)
| Okta Group name | User type to override | Tability permission |
| ------------------ | --------------------- | ------------------- |
| Tability Owners | owner | owner |
| Tability Admins | admin | admin |
| Tability IT Admins | itadmin | itadmin |
| Tability Users | user | user |
| Tability Readonly | readonly | readonly |
You will also need to use the assigned order of the groups is the same as in the picture below. This will ensure that if a user is a member of 2 different groups, their role will be determine by the group that has the highest priority.
For instance, if a user is part of **Tability Readonly** and **Tability Admins**, then they will get the admin role because that group has the highest priority.
Once your groups are added you can simply add users to the group and they will be added to Tability.
You can confirm that a user is synced with SCIM provisioning by going to the Users setting page in Tability and looking for a checkmark in the SCIM column.